Before starting
The administrator accesses the CryptPeer system directly from their web browser.
- Open the browser on their computer (e.g. Chrome, Edge, Firefox).
- Enter the official CryptPeer login link:
https://cryptpeer------- - Log in with their administrator credentials.
Dual-Use Doctrine
No additional software is required. CryptPeer operates entirely in the browser, in a secure HTTPS environment, under the exclusive control of the licensee.
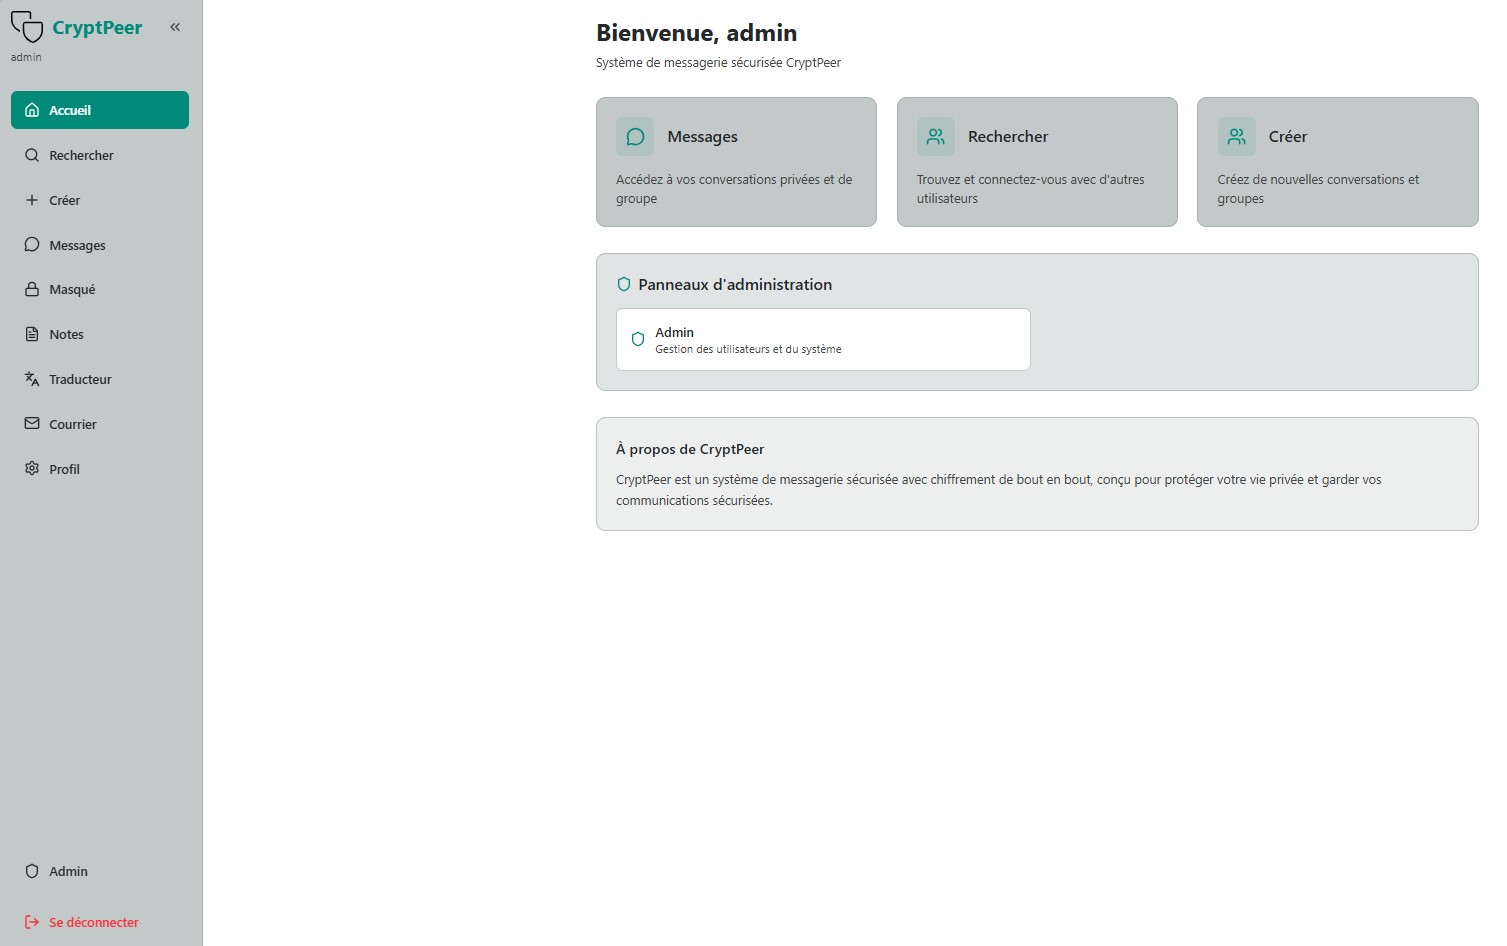
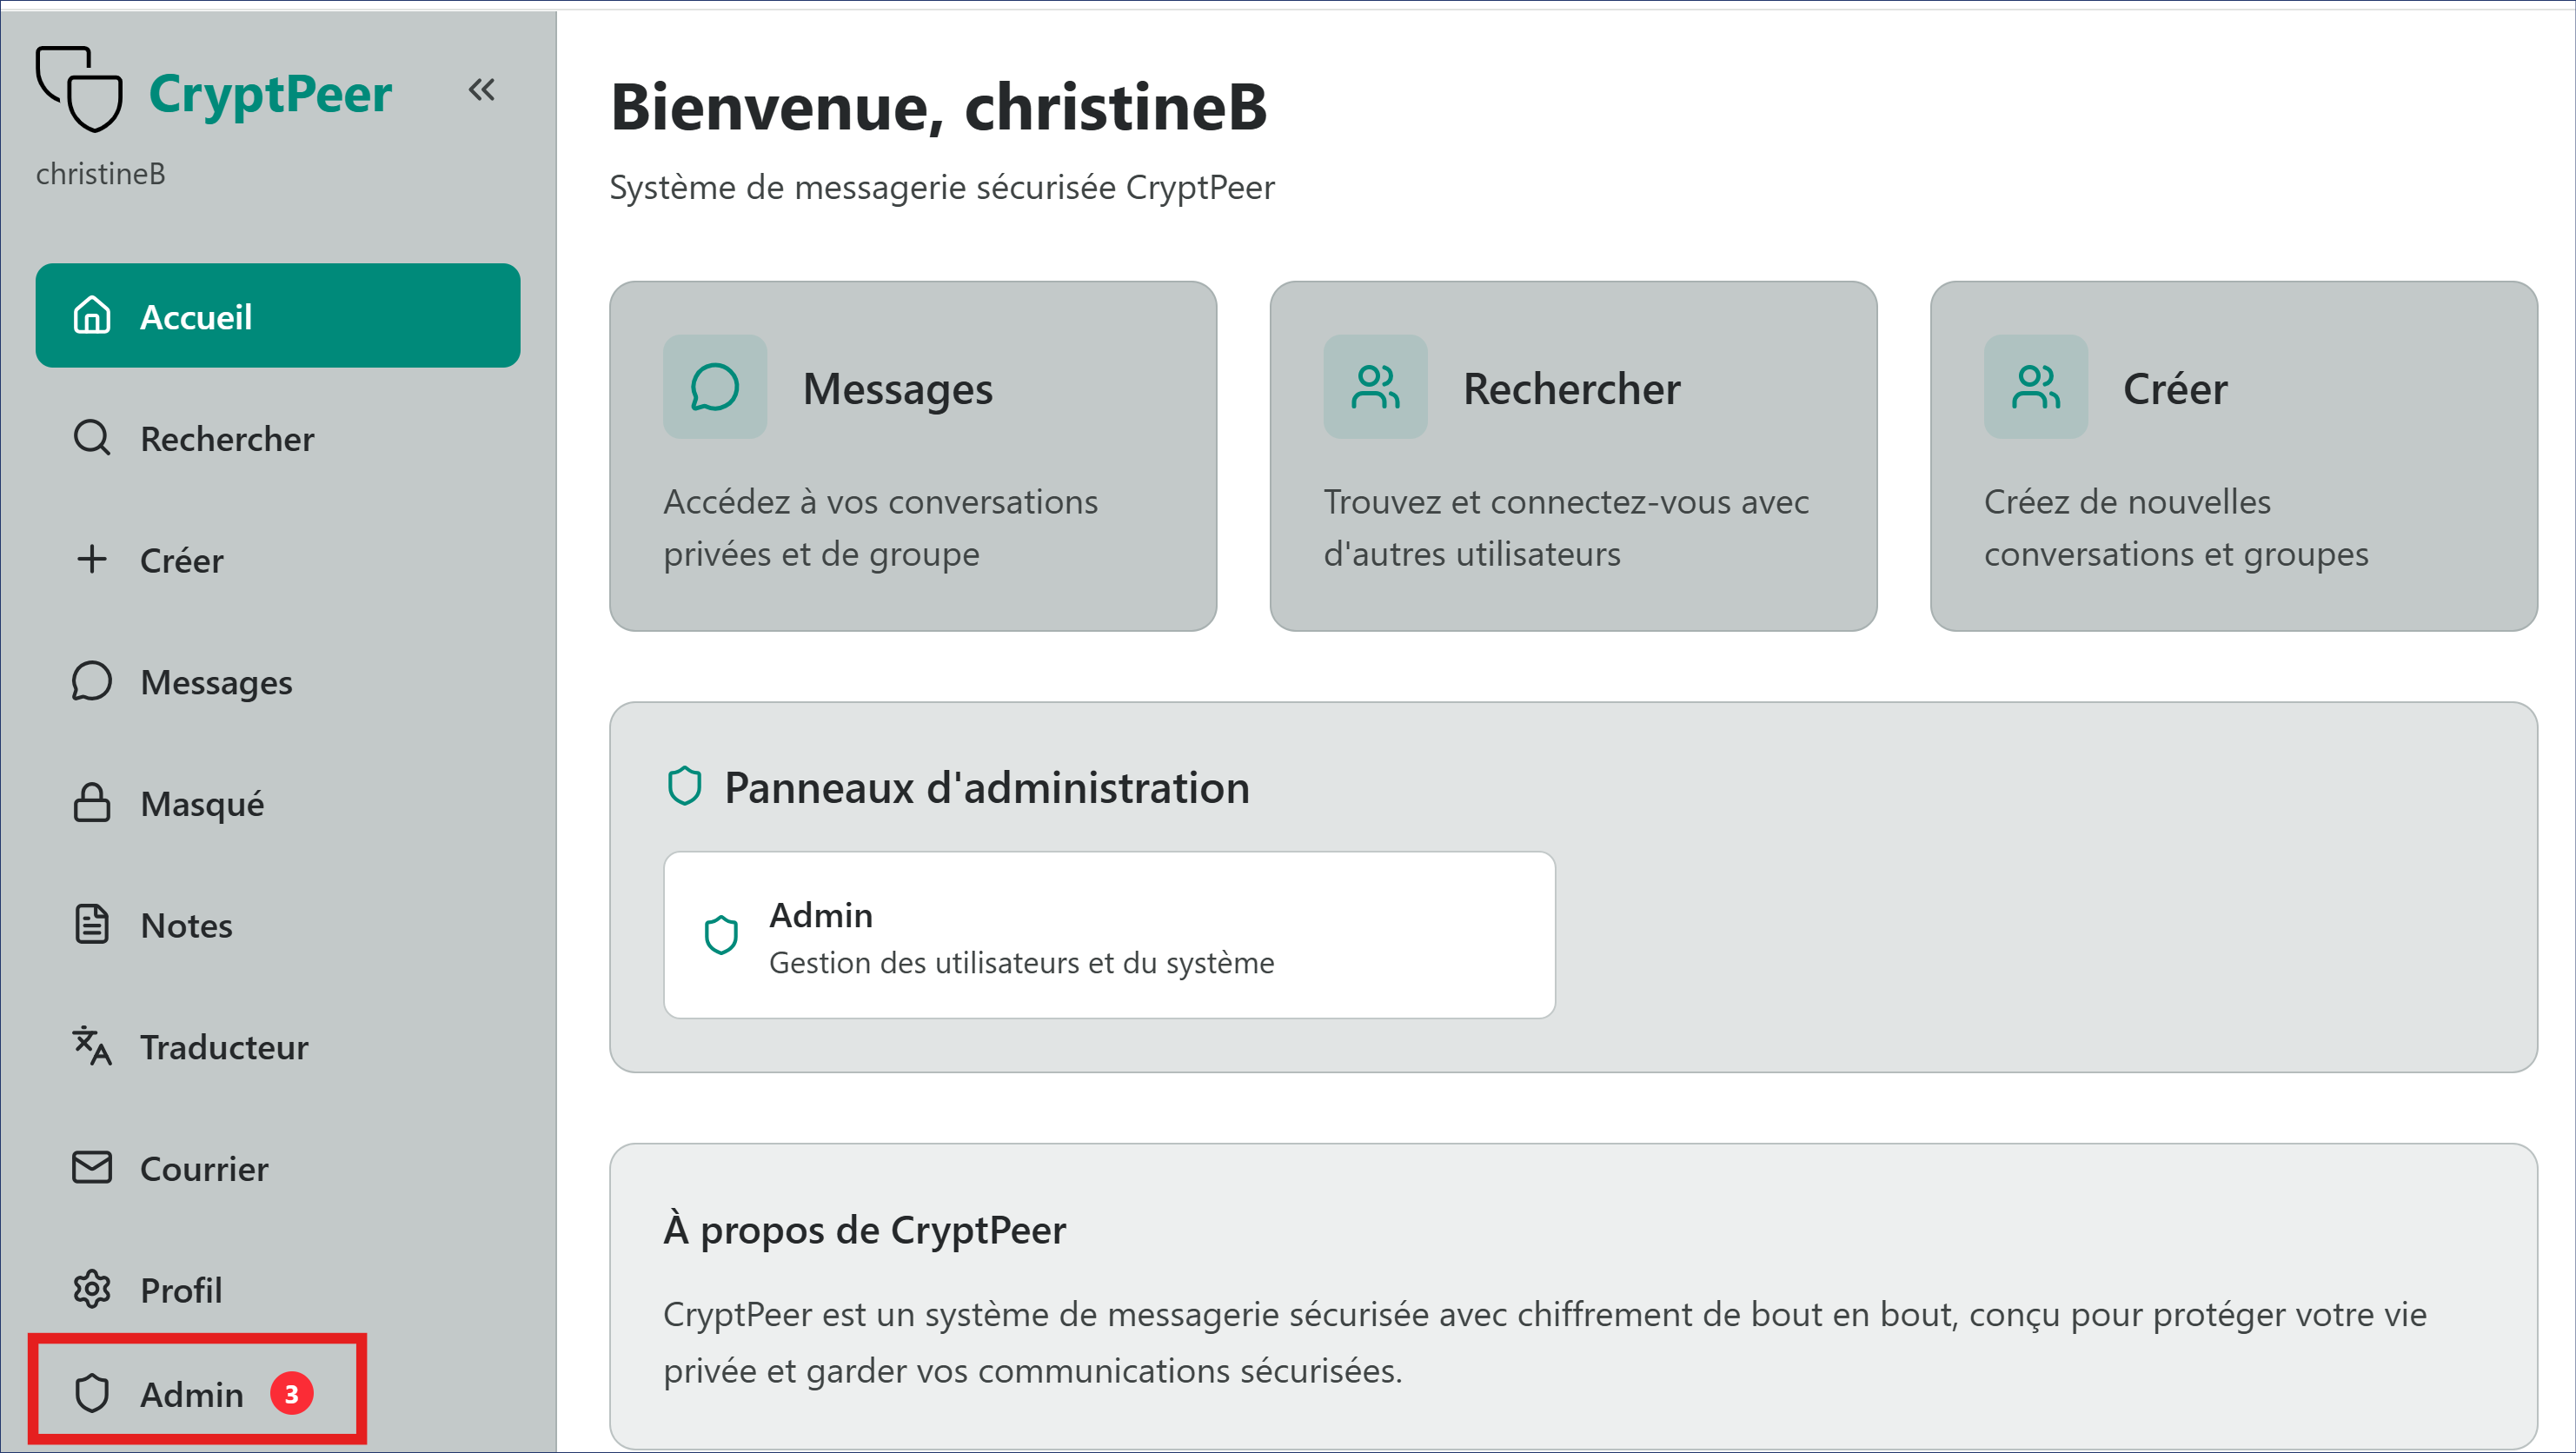
Home and general interface
As soon as they log in, the administrator accesses the CryptPeer home page, which presents all the system’s main features:
- Messages: access private or group conversations;
- Search: find and connect with other users;
- Create: launch new conversations or groups;
- Admin panels: section reserved for system management.
Good to know
The administrator dashboard is accessible only to accounts with the Admin role. It allows the management of users, categories and rights without ever accessing the content of encrypted communications.
Administrator role
The administrator represents the guarantee of integrity and internal consistency of the CryptPeer system. Their role is not technical: they validate, organize and supervise user identities and categories.
In CryptPeer, no external intervention is possible: all control belongs to the instance administrator.
Security and limits of the administrator role
The administrator never has access to data in cleartext: encryption is performed upstream from CryptPeer users’ devices. Communications therefore always remain encrypted. Even if the administrator’s credentials are compromised, the attacker will only have access to the functions available to administration — no content of exchanges.
Furthermore, the administrator is not authorized to delete accounts without the approval of the super administrator. This rule further limits the nuisance potential of a compromised administrator.
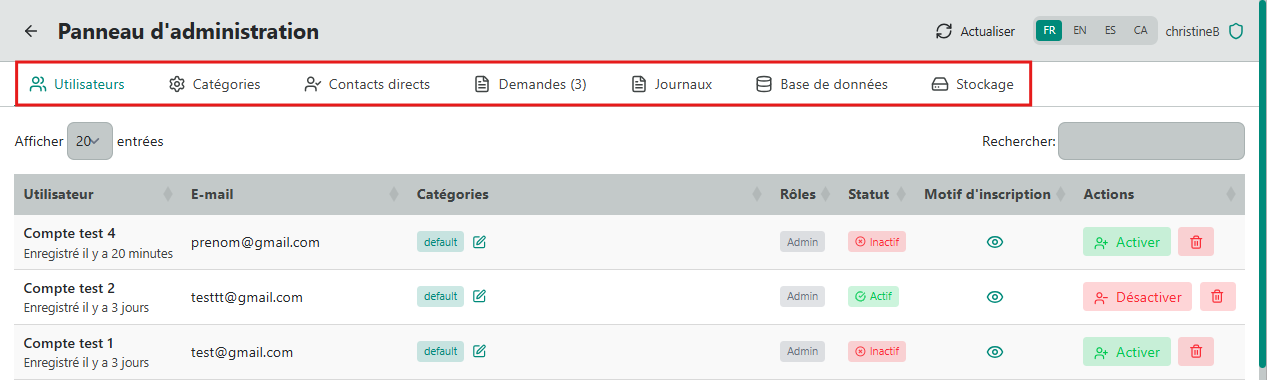
Accessing the admin panel
By clicking “Admin”, the administrator opens the admin panel. It consists of several tabs:
- Users – activate or deactivate accounts; account deletion reserved for the super administrator;
- Categories – create or manage user groups;
- Direct contacts – manage validated relationships;
When a new user registers, their request is visible in the “Users” tab and their status appears as “Inactive”.
The 18-language selector ((ar) Arabic, (ca) Catalan, (de) German, (en) English, (es) Spanish, (fr) French, (he) Hebrew, (hi) Hindi, (it) Italian, (ja) Japanese, (ko) Korean, (nl) Dutch, (pt) Portuguese, (ro) Romanian, (ru) Russian, (tr) Turkish, (uk) Ukrainian, (zh) Chinese) at the top right allows changing the display language of the admin panel.
Registration request management
When a new user registers, a validation request notification appears in the dashboard.
Management takes place in the admin panel by clicking the “Requests” tab. The number displayed in the top bar (e.g. Requests (3)) indicates the number of registrations awaiting action. This page allows the administrator to:
- view the list of users who have requested access;
- check their information: name, email address, registration date and reason for registration;
- approve or reject each request according to the organization’s internal policy.
Step 1 — Review the request
In the left sidebar, the Admin icon shows the number of requests awaiting action. The number (3) indicates, for example, that three user account requests must be reviewed. Each record presents the main information:
- Name or identifier;
- Email address;
- Registration date;
- Reason for registration (visible via the link view the reason for registration).
This verification ensures that only authorized users are granted access to the CryptPeer system.
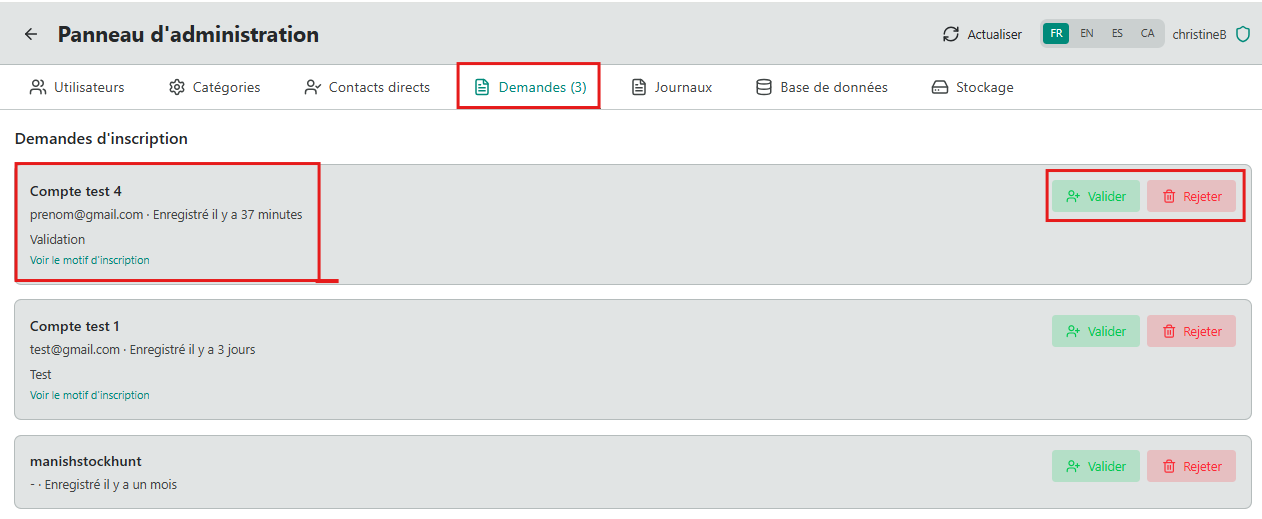
Step 2 — Approve or reject the request
- Approve: Click the “Approve” or “Activate” button to accept the request. → The account is immediately activated and automatically changes to Active status.
- Reject: Click “Reject” to refuse the request. → The registration is cancelled and the user appears in the “Rejected users” tab.


Traceability
Each action is automatically recorded in the “Logs” section, with the date, time and identity of the administrator who performed the operation in order to preserve a verifiable trace of operations. No third party or external service is involved in this process.
Creating and managing categories
Categories are an internal tool for structuring and organization. They allow the administrator to group users according to their role, department or the sensitivity level of their communications.
Categories are completely invisible to users who do not know which category or categories they belong to. Only the administrator can view them, create them, modify them or assign members to them.
Purpose of categories
Categories allow:
- grouping users by function or mission;
- facilitating the management of internal exchange rights;
- maintaining a clear and hierarchical view of members for the administrator.
Categories have no impact on encryption or communication rights: they serve only for governance and the administrative readability of the CryptPeer system.
The "default" category
As soon as their account is created, all new users belong without exception to the “default” category. This category plays a welcoming role:
- It gathers all registered users, including those assigned to other categories;
- it allows them to see only the “admin” account;
- they can therefore send their questions or requests directly to the administrator, while waiting to be placed in one or more categories suited to their role.
When a user is added to one or more other categories, they remain a member of the “default” category. It acts as a minimal access channel, ensuring continuity of the link between users and the administrator.
This configuration guarantees minimal, secure and controlled initial communication: no user can see another member until they have been integrated into an authorized category.
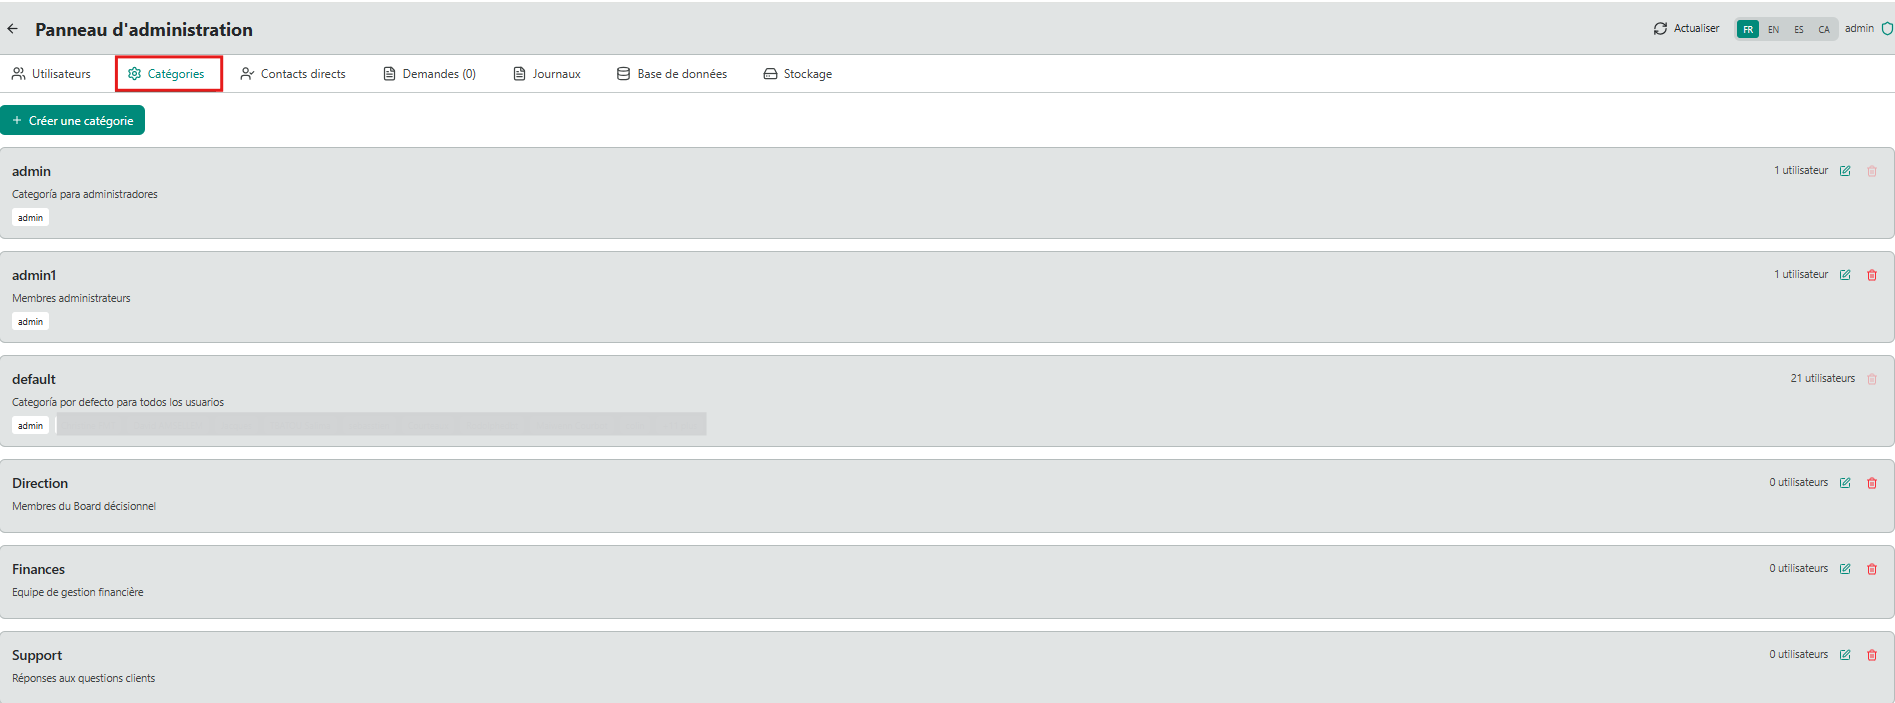
Available actions
From the Categories tab, the administrator can:
- Create a new category (examples: “Management”, “Project team”, “Support”…);
- Assign one or more users to one or more categories;
- View the list of categories and their internal descriptions;
- Modify the description of an existing category;
- Archive or delete an obsolete category.
Attention
Once created, the name of a category cannot be modified. This rule guarantees the stability and traceability of the internal structure.
Each category includes:
- a readable name,
- an internal description,
- a unique visibility scope, reserved for the administrator.
Categories are an internal organizational tool: they do not change the security structure, but guarantee clear, segmented and sovereign governance of users.
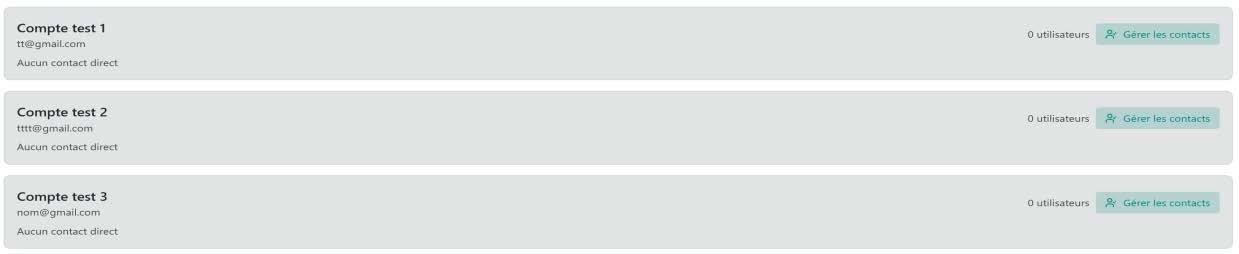
Direct contacts management
The “Direct contacts” tab allows the administrator to establish, in a targeted way, a bilateral communication connection between two users, without going through a category.
This feature is used when it is necessary to allow a one-off or individual exchange, while maintaining the organizational isolation provided by the category structure.


Purpose of direct contacts
Direct contacts are a complementary mechanism to categories. They allow the administrator to:
- create a restricted communication channel between two specific users;
- meet a need for individual communication, without modifying the category structure;
- maintain complete traceability of granted authorizations.
This function meets controlled bilateral communication needs: no other user is aware of these links nor has access to them.
How it works
- The administrator selects a main user.
- They assign one or more “direct contacts” to that user.
- The link thus created allows only this main user to communicate with the designated contacts.
Direct contacts cannot see each other and cannot communicate with each other. Only the channel defined by the administrator is active.
Examples of use cases
- Allow a manager to communicate individually with several collaborators, without them being able to communicate with each other.
- Create a temporary liaison channel between two specific contacts, without creating an additional category.
This approach maintains organizational discretion while guaranteeing strict control of communication flows.
Supervision and traceability
The administrator can, from this tab:
- view each user’s active links;
- add or remove a direct contact;
- delete at any time a bilateral link that has become unnecessary.
All modifications are automatically recorded in the “Logs” with the date, time and identity of the administrator who performed the action.